DIY ~ Bird Bath and Stool

I love the birds. We have a family of sparrows, a few blue tits and the odd robin. I've tried varying the food to get in some different types, but I'm happy with the sparrows and the colourful tits. At the moment I have an old seed tray that I keep topped up with water that the birds seem very happy with, but I thought they deserved an upgrade.
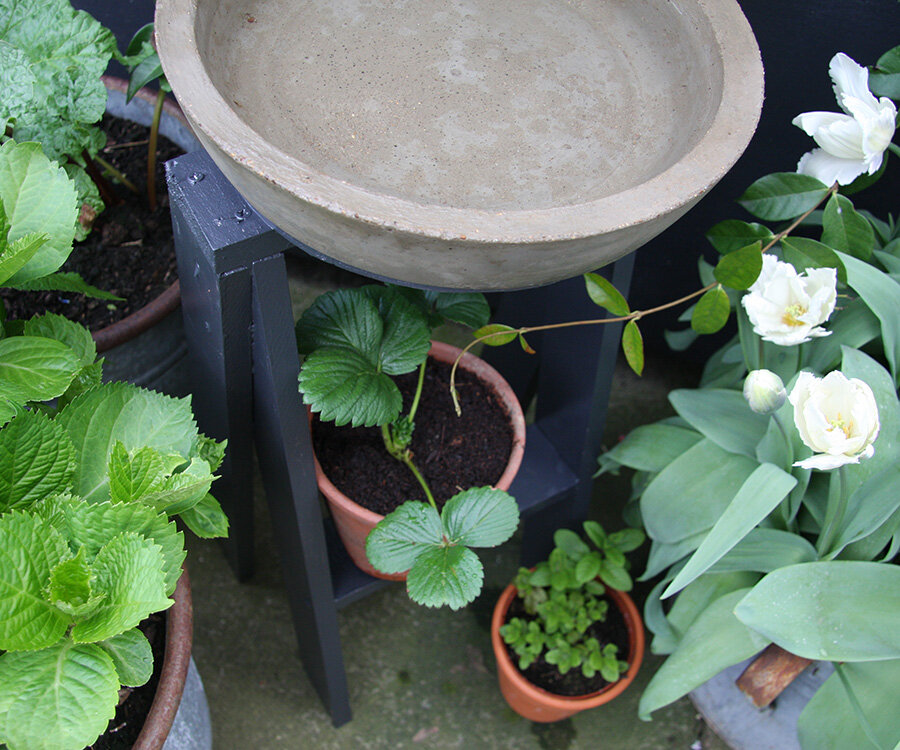
I've been wanting to get my hands dirty with concrete for some time, so this seemed like a good first project. It's unlikely your first go will be perfect. My first bird bath, the concrete wasn't wet enough so my bowl was lumpy, my second one the bowl set unevenly (although the birds might appreciate a deep and shallow end) which is why I've added a spirit level to the mix and had some seriously large holes as I didn't bang it enough on the floor. This is my third one.
If you want to make the stool, but don't want the dusty drama of concrete, then a large terracotta plant pot saucer would be an ideal cop out.
The stool is like a Japanese stool design and is really easy to make, once you have the dimensions. It has multiple uses around the garden, can be used in pairs to hold up a small table or crates or instead of a bird bath, a round planter to add some height.

THE BATH
MATERIALS + TOOLS
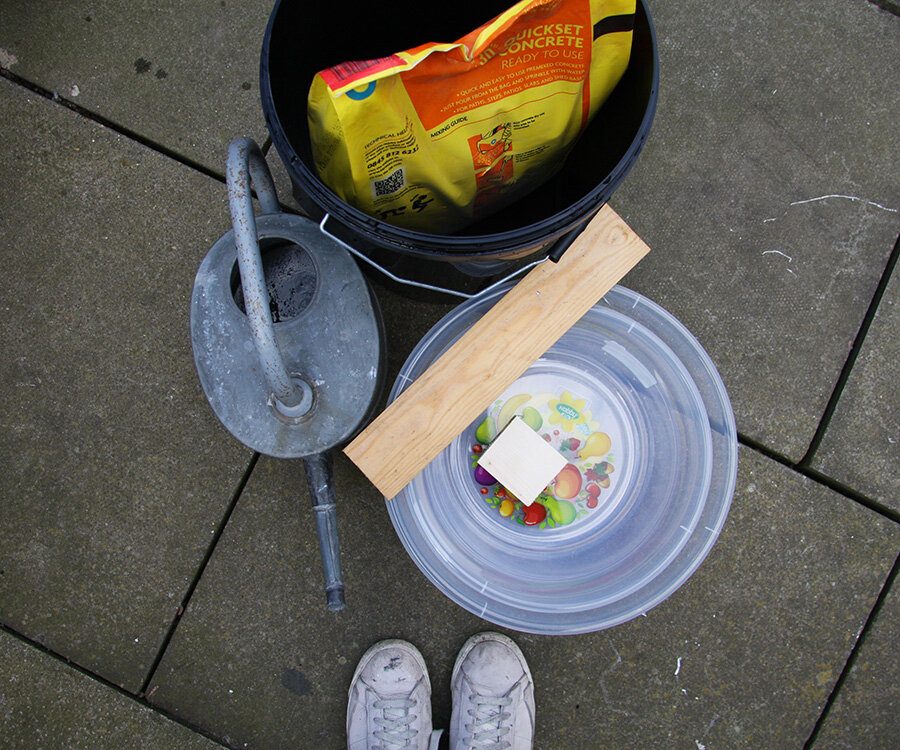

Bag of Ready to Use Concrete ~ I used the fine kind which you can just add water too, make sure it doesn't have gravel stones in, otherwise you will have a very knobbly bird bath.Two cheap plastic bowls, one slightly smaller than the other.Concrete sealerWater (tap is fine 😀) + some kind of oilBucket, something to mix the concrete easily with, watering can with rose, bricks or something heavy and a spirit level might be useful.Glasses, this stuff is dusty!
METHOD
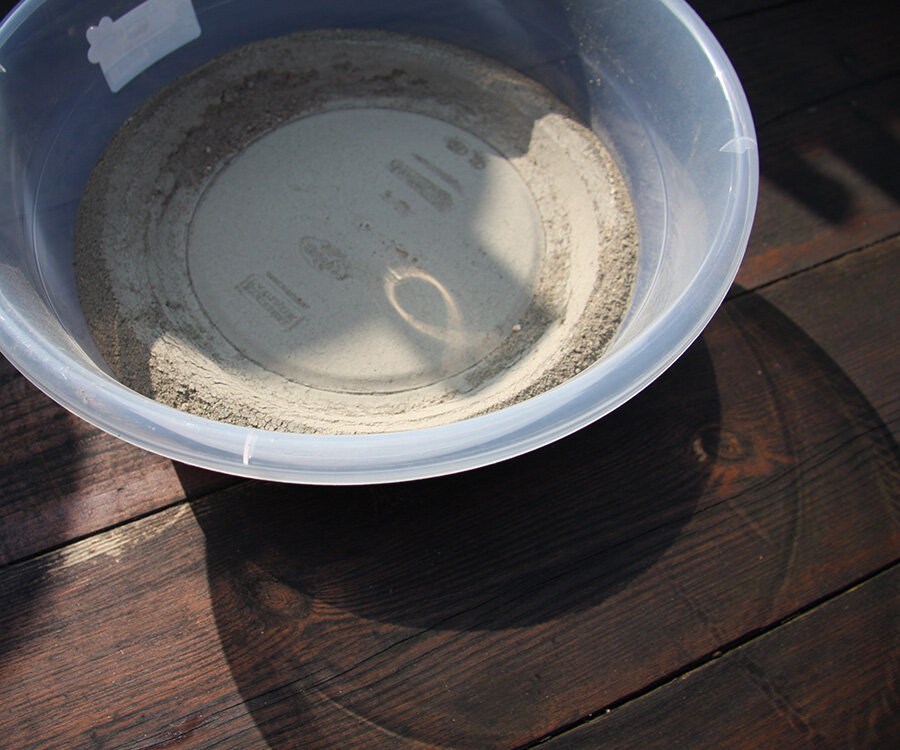

If you've never worked with quick dry concrete before then prepare yourself for a level of intensity, not previously experienced in the garden. As when they say 'sets in 30 mins' they mean it sets in about 10 mins, so you need to make sure you have everything ready to roll, before the water hits the concrete bucket.Use a spirit level to check you have an even surface for drying and fill the watering can.Put the dry mix in the large bowl first, to check how much you need then pour back into your mixing bucket. Clean the large bowl and you can smear oil around the inside, to help you remove it.We're looking for the consistency a bit like peanut butter, so thick enough that you can move it around but not too wet that it's like a sloppy chowder.Get ready... go!Count two seconds when you pour the water in (use spray rose) and mix furiously. You may need more water, so count one second for each time until you reach 'peanut butter'. Then pour into your bowl on your even surface and bang loads of times to get rid of any large bubbles. Put the smaller bowl bang in the middle and weigh down with bricks. Check the smaller bowl is level in the big bowl.Leave overnight then ease it out carefully. Sand off any rough edges and then paint it generously with concrete sealer. All done!A word on bubbles, as much as I banged it, it's going to be hard in the timeframe to get rid of all the bubbles, but you can always wipe the bowl with some dry concrete dust and water afterwards with a paint brush. That's what I did, as I couldn't live with the holes.
THE STOOL
MATERIALS + TOOLS
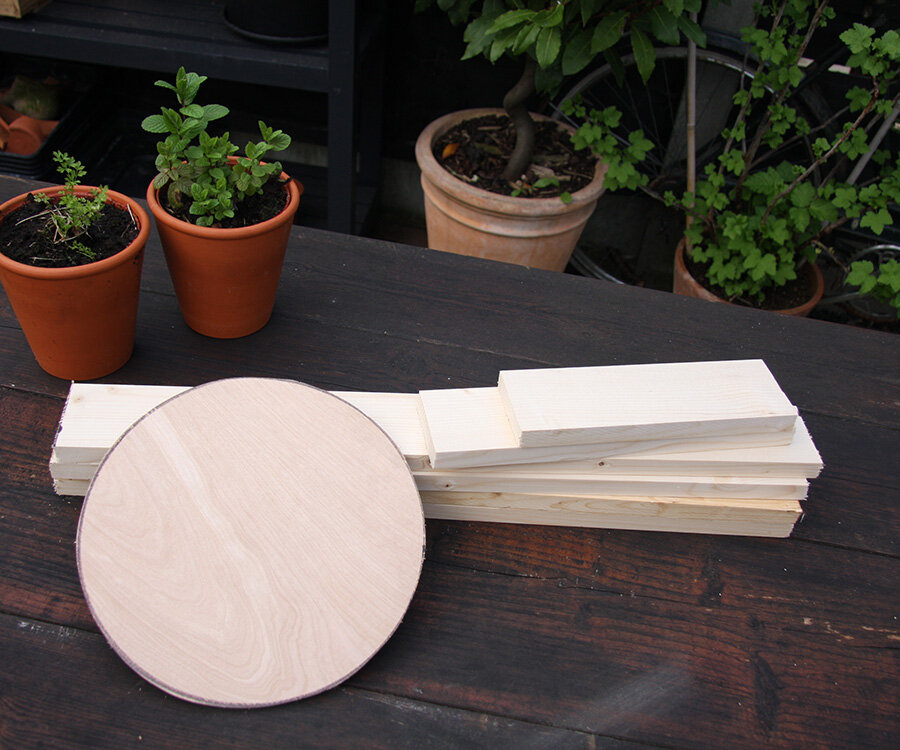
Wooden slats: 6.9cm x 1.8cm x 240cm x 2Cut to size: Long: 60cm x 4 ~ Medium 30cm x 1 ~ Short 23cm x 1Exterior plywoodCut to size: 25cm-ish circleLong wood screws • Short wood screws • Primer paint • Exterior paintDrill • Cutting saw • Paint brush • Pen & tape measure
METHOD
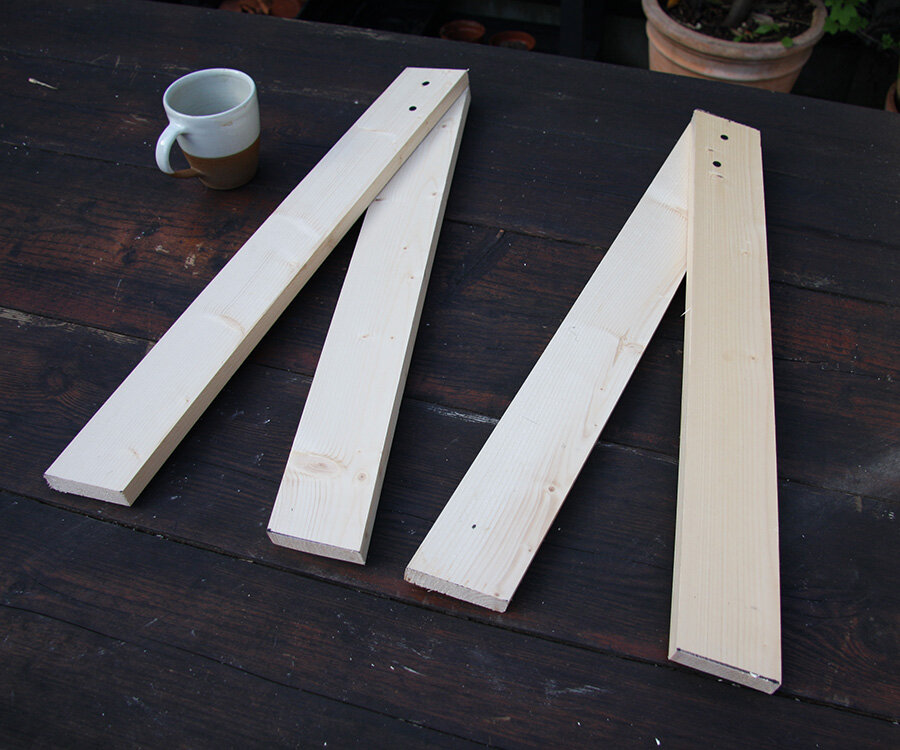
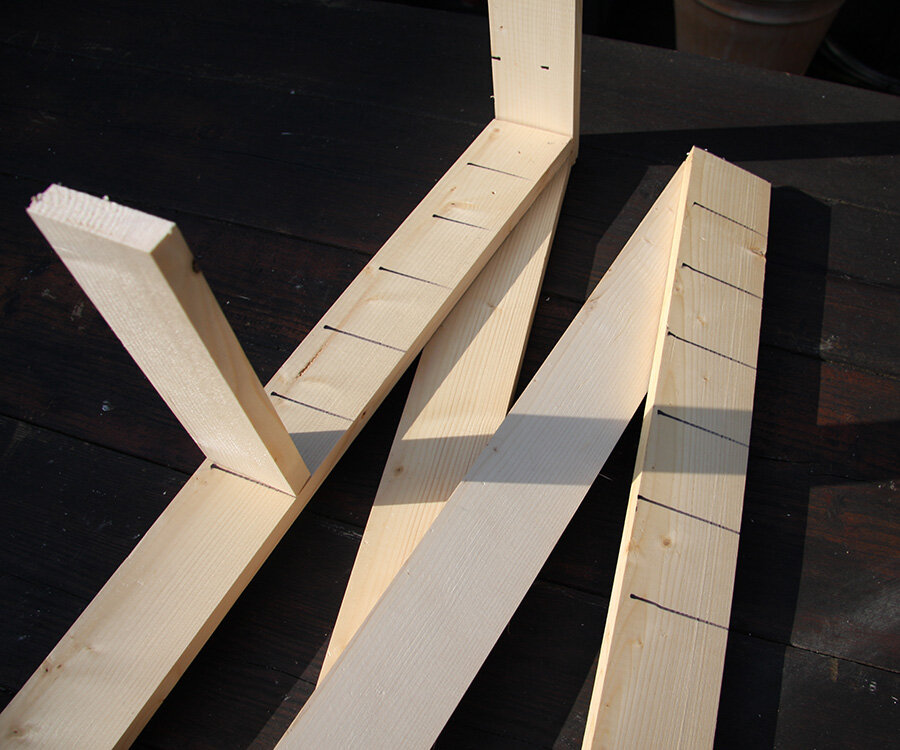
Take the four long slats and mark 1cm on opposite ends of each plank, then draw a diagonal line for cutting.

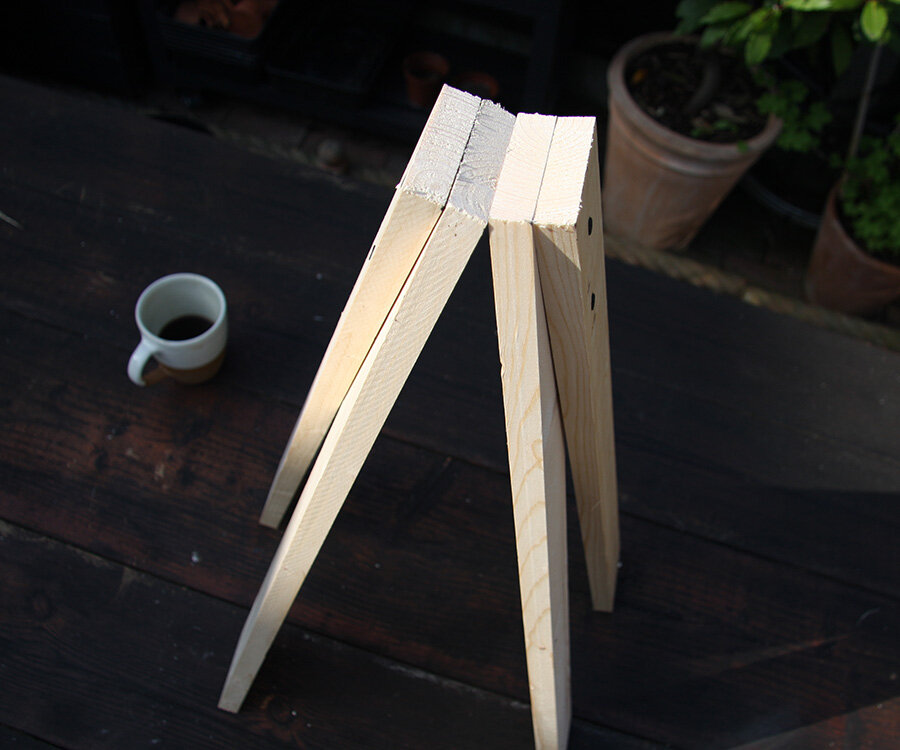
Overlap the two ends so you have two Vs and screw in place, you want the bottom of the V to be about 25 cm wide.
You should have the two inner slats together and two outer ones on the outside.
Mark down both inner slats of the V for the little shelf. Screw the medium slat to the top and the shorter shelf slat about half way down. Then screw in the other V slat.
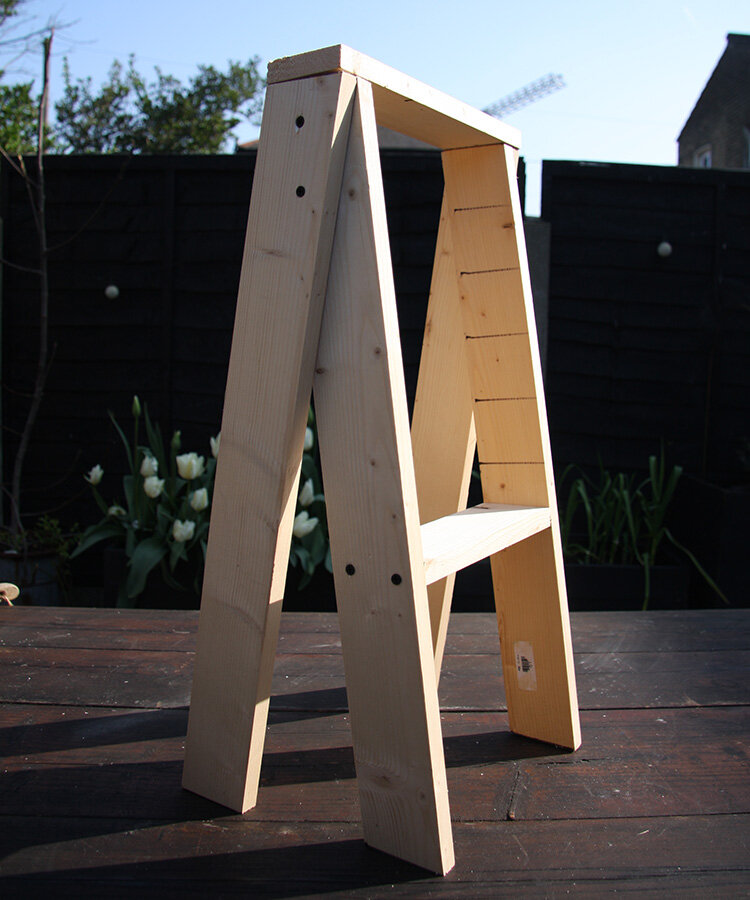
Here we go! If we just wanted a stool, then we would leave it here…
…but as we’re adding a bird bath on top, screw in the plywood circle. Use the short screws for this bit and make sure they are level on the top or your bird bath will wobble.
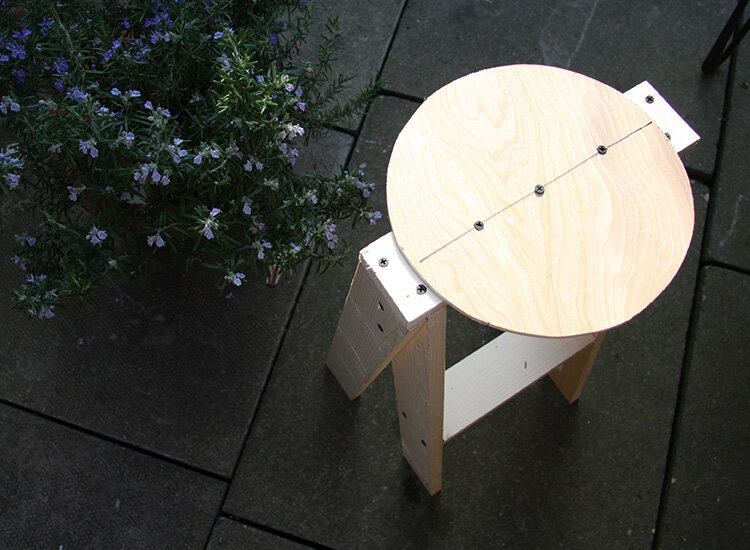
As the other projects, give everything a good slosh of paint, with a primer and two coats of exterior eggshell.
Let the birdie bathing commence!

"A garden is a delight to the eye and a solace for the soul."
Saadi
